Saturday, November 14, 2015

DIVINING PENDULUM GIVEAWAY for YULE & Winter Solstice - Witch, Wiccan and Pagans

Camille Eichorn -- you are the random winner of the diving pendulum!!! Please send me a message or comment (it will NOT be published) of the address you wish me to mail the pendulum too!!! :D Congratulations!  I will mail out the pendulum the first week of January (if I receive your address!)  (after the holidays) with tracking .
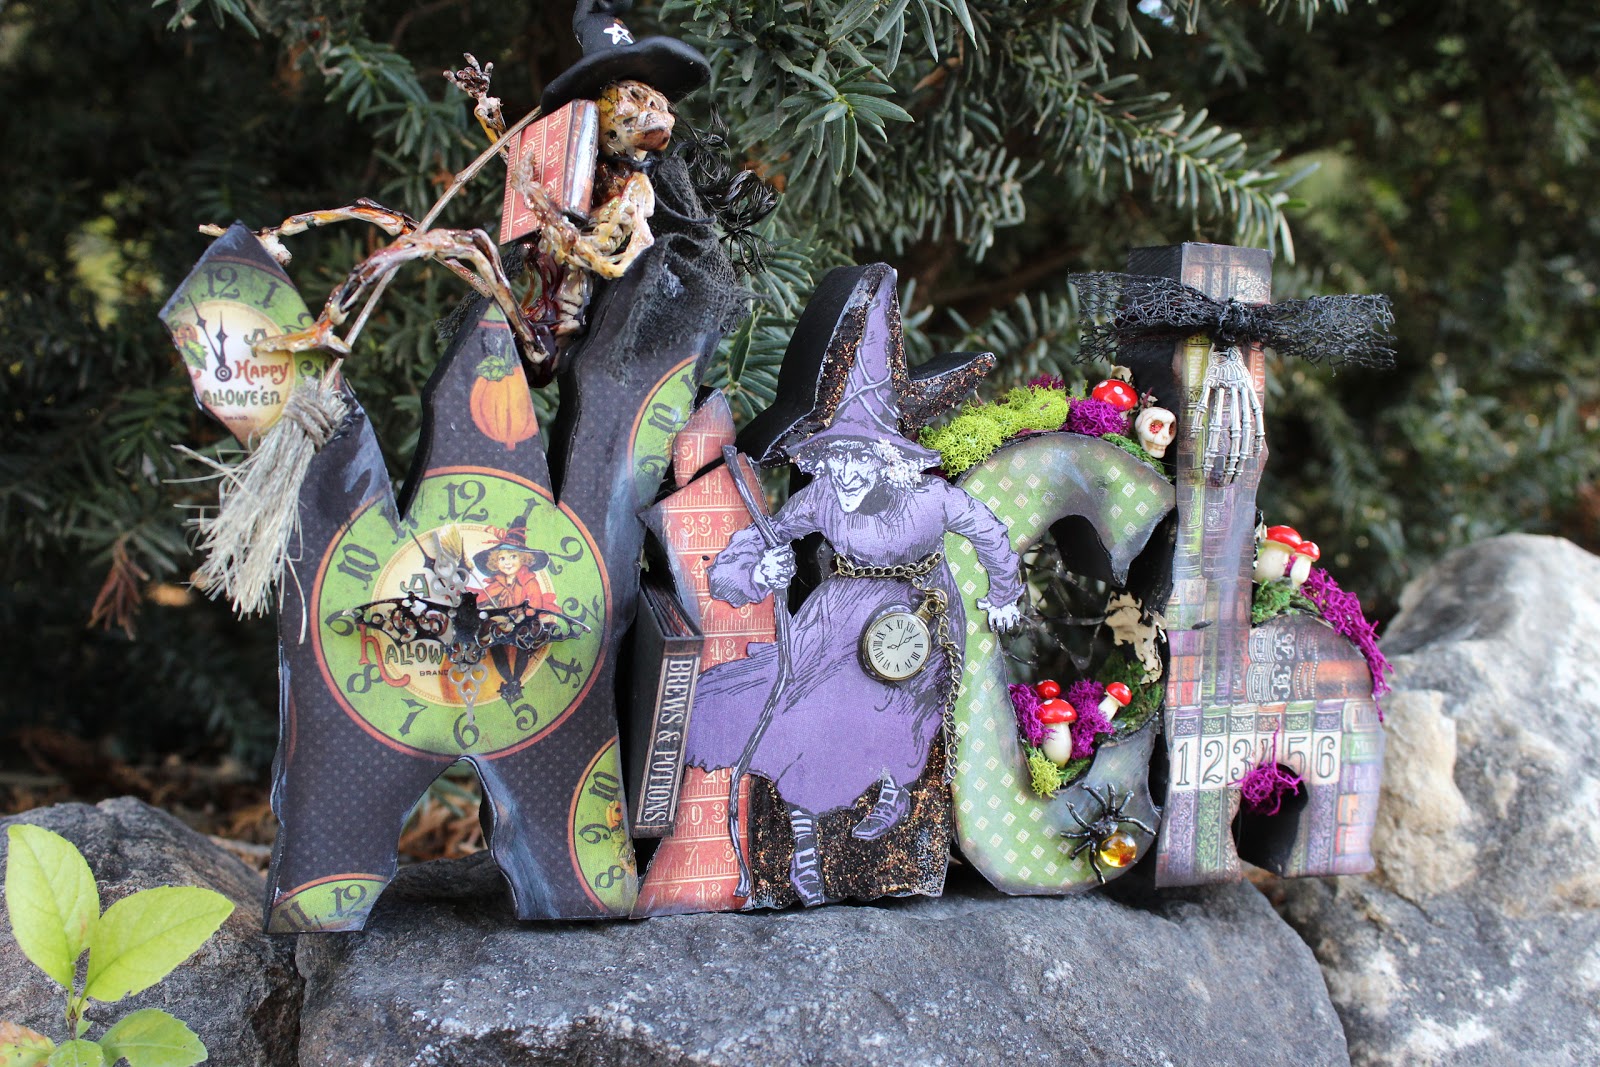
BLESSED YULE and Happy Winter Solstice! Thought it was high time I did a giveaway for all my friends in the Witch and Pagan communities.  Simply COMMENT below this post to be included in the free giveaway (I WILL ship overseas)(If you don't want your comment to be seen, put "don't publish" in the comment as I know some witches and pagans are not "OUT OF THE BROOM CLOSET" yet and I have all comments set to moderation) .  If you would like to JOIN my blog, I would love it!! but it's not required to enter the giveaway.  Winner will be by random draw.  I will do an announcement posting of the winner on December 20th and will message the winner for their address, if they do not respond in 7 days, I will draw another name -- so please check back between Dec. 21-Dec. 27).  

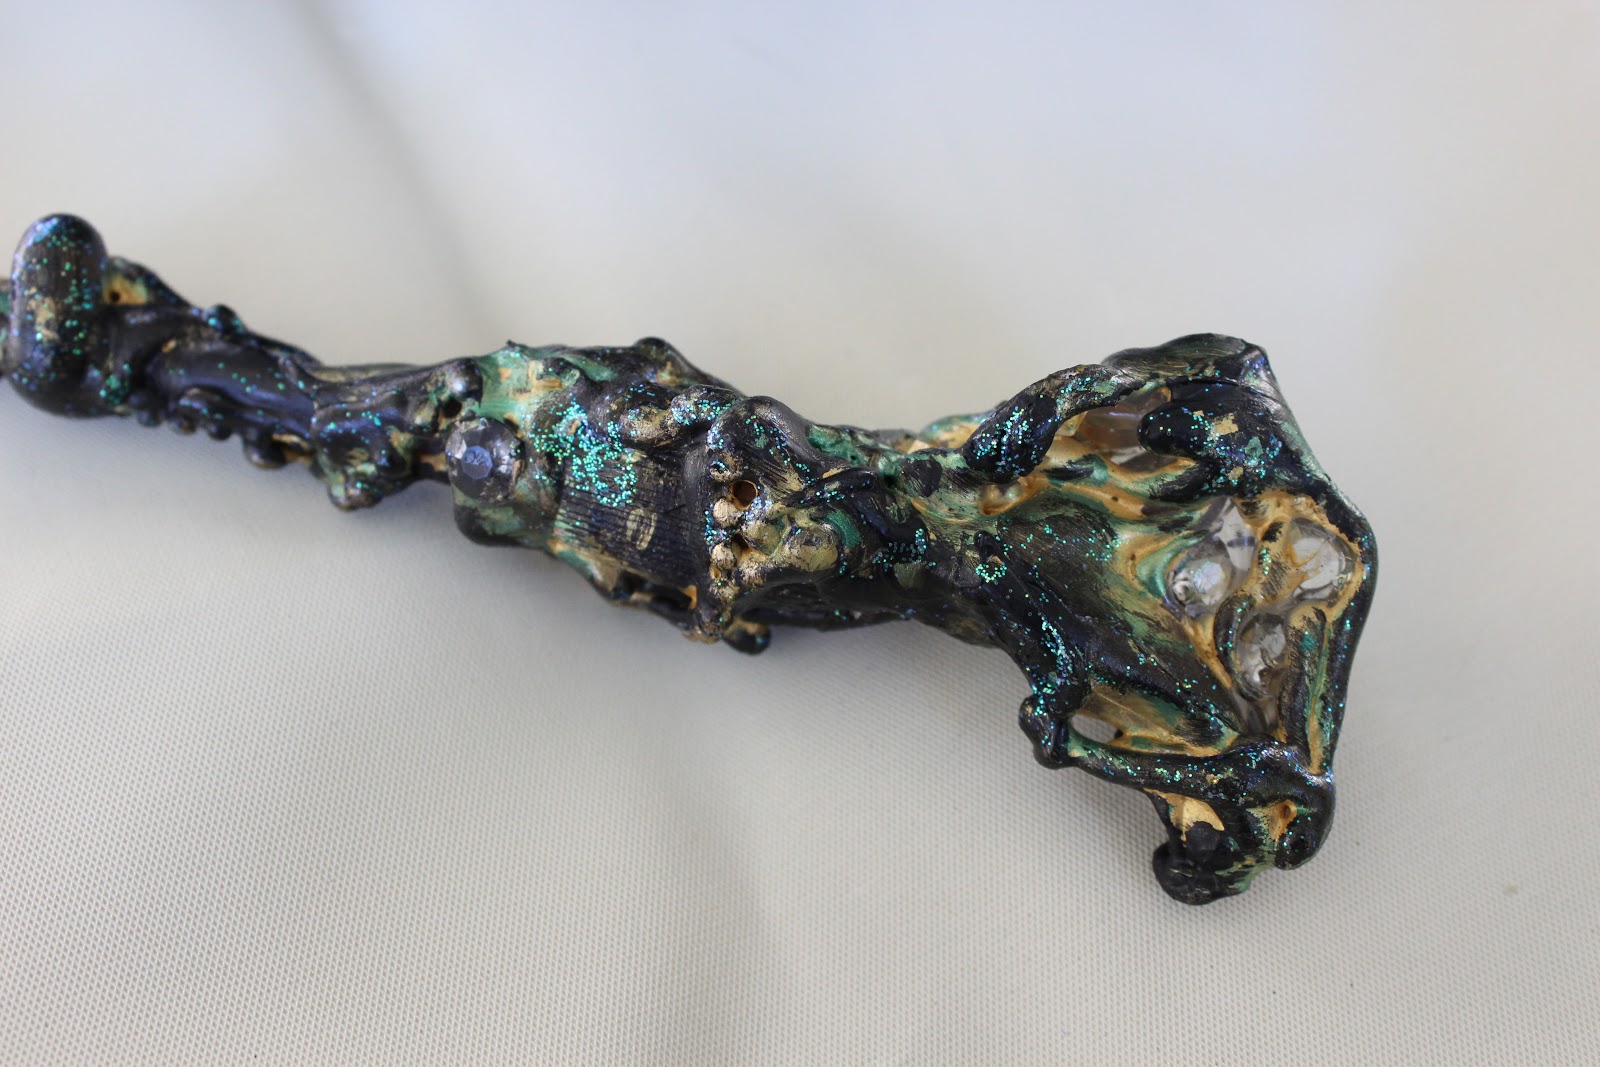
The winner will receive the handmade pendulum above.  It contains natural gemstones and a 925 silver chain.  This pendulum is approximately 13.5 inches long (roughly 34 centimeters) from tip to tip.  If you haven't ever used one there are several tutorial videos online and printables you can use as "maps" to get answers. "Maps" for divining are easy to find (there are  many online).  Here is one quick LINK .

(sorry, NO person I've actually talked to face-to-face is eligible to win - everyone else is fair game in the random draw. )


I will mail this pendulum in a little velvet bag.  It has not been charged and as with all the tools such as wands, amulets, and pendulums that I create, I make them while feeling no strong emotions.  I believe that aids in keeping them energy free and makes charging them easier.

This pendulum was made with:
*Snowflake Obsidian (the actual pointy pendulum) - a neutral protective stone known for amplifying clairvoyance while also providing protection against deceit
*.925 real silver chain - awareness and clarity - alchemists attributed silver directly to the female deities (Rosicrucian attribute it to Artemis, Renaissance alchemists to Diana, and Arabic alchemists invoked Manat when working with silver
*Smoky Quartz (there are 4 small pieces): an anchor, an intensely protective stone against negative energy
*Amazonite (the bluish green stone): calms the mind, removes negative energy
*Labradorite (the flat round dark stone): most consider it the most powerful of mystic stones aiding in the separation of earthly and ethereal realms and aiding in psychic development
*Natural Agate (the larger stone):  inner stability and clear unbiased judgment
*The crescent moon and pentacle charm and all metal findings (other than the chain) are made of alloy

Just a reminder, anyone is permitted to sell their Gothic, Witch, Pagan, Steampunk, Halloween items and advertise on my Facebook sales group JUJU CRAFTS

Monday, November 9, 2015

Making Witch Wands with 20 Year Old Green Eyed Salina, my eldest cat

Almost 20 years ago, my husband saved a tiny kitten by running off several children who had her pinned in the lower branches of a pine tree and were hitting her with large sticks.  We were so enraptured with her bright jade green eyes we never even bothered trying to find her original home.  She immediately joined our family and took over as nanny to our son.  Should I ever raise my voice to "her baby boy" I was immediately disciplined.  Once she even jumped and clawed my back.  I could get upset at other things, other people, even my husband (we did an experiment) and she didn't mind, just as long as I always had my emotions in check when dealing with our son.  She's never taken much interest in my crafting, whether I was knitting, paper crafting or making jewelry.  So today, when she came over, lay on the table and pulled a Lilac wood core wand that I was making for a Pagan friend under her head, (maybe I should research what Kyanite and Amethyst  does for kitties)  it was too darling to pass up, it was definitely time for a photo shoot.  I'm not sure the lady who ordered this wand is going to get it :) Salina its quite attached to it.


 Whenever I moved items around on the table she would pull this one specific wand back over toward her.  She had no interest in the other wand or items on the table, not even the twine.

I asked her if this wand "was her favorite", this was the look I got.  Says everything doesn't it?


 I was glared at when I suggested I should move it.  Looks like this wand order is going to take a little longer to fulfill.

Wednesday, October 28, 2015

Halloween Mini Album using several Tim Holtz dies including Skull & Headstone with Opening Pages, Chunky Charm Dangle, and Handmade Paper Roses


Had a lot of fun making this one.  Every page folds out to multiple pages, there are over 30 tags.  Here are just a "ton" of photos and hopefully I can find my long lost camera and do a video soon.
Opening to the front

The tags remove from behind the frames for extra photos.


Each file has a magnet to help it stay closed
 A photo can fit behind the row of little tombstones if needed.  But that paper is almost too haunting to cover.
Turn the hand and ...


My favorite - the Arch "windows" are 3 layers of chipboard thick.  The resin Gargoyle frames are from Ebay as are the winged charms.  The hand and 2 headed twin cabochons are made from resin poured into silicone molds purchased from ebay, painted with black acrylic touched with gold Krylon paint pen.  The "veins" along the arch frames are simply hot glue.
Each large photo mat comes out of the red painted filigree for more photo storage and the fold out extension has a few flat magnets to keep everything lined up.


The blood "veins" are hot glue coated in Red Alcohol Inks and Stickles glitter glue.  Tim Holtz' wishbone and a little glass bottle altered with "ELIXER" and glued in cork.
The eyeball is a piece of dome resin that I painted on the backside.   The skull is 4 layers of chipboard that I cut around the eye in the bottom two layers to make the eye lay flat.  Dyed with Ranger Ink Dylusions and Color Wash sprays, cheesecloth pokes through the other eye.  The black roses I made using EK Success Retro Flower Punch and coated in Triple Thick to make them fairly hard (I hate squishy flowers).  The words "haunted" and "wicked" are from Tim Holtz dies, Handwritten Halloween thinlits.
 Using 2 large eyelets on each side, I added a length of thick, lightweight, black metal chain made by Blue Moon jewelry and then connected the two sides with a lime green ribbon.  All the other ribbons and fibers are from the tags.


 I was in a swap for a Halloween Chunky Charm Dangle (with Mini Album Scraps) and made one for myself!! The dangle clip is Tim Holtz Idea-ology.
This is a pile of most of the tags pulled out of the book but there were several more.  Tons of spots for journaling and little photos.


Tuesday, October 20, 2015

Halloween WITCH HAT Night Light Home Decor with Skulls Spider & Black Roses


The CRAFT HOLE, a Face Book group, posted an event to decorate a witch's hat.  You could either make one or use an existing hat and add embellishments to meet the challenge.  I looked and looked to find some paper mache hats that I know I have had for years and never decorated ... alas, I finally gave up.  But in searching through the craft hoard, I found an "abandoned" Halloween Tussie Mussie that I had started years ago and never finished.  Gluing it to a piece of black chipboard that I had accidentally hit with overspray splatter ... voila' I had a witch's hat!
The roses were pink (a $1 yard sale find). I sprayed them black with Ranger Dylusions spray.  All ribbons and the real reindeer moss under the inset skull are from my stash.  The raised "dots" around the hat's brim and the inset are little plastic flat back resin rounds that were attached with Glossy Accents.   A wash of black gesso and water were brushed over them.  You can still see a few spots showing through of their original hue - transparent yellow.

Cutting the bottom out under the Tussie Mussie, I used the cutout piece and trimmed it, inserted it farther into the Tussie.  That created the shelf for the inset skull.  Before I glued it in place, I punched a hole big enough for the flame of a battery operated tea light!!  After cutting one of the plastic skulls in half, I added a little paint to give it more shadow and glued it in front of the tea light's flame on a bed of moss.  It created a fun eery night light.

I used hot glue to "draw" the dimensional spiderweb on the side and painted over it with a black gesso wash.  When that dried I dry brushed the web with white gesso.  All splatters are either orange acrylic paint, black gesso wash, or white Dylusions spray.  I just slung it off the brush (and also splattered my pocketbook ... sigh).


Here's what the BEFORE looked like after I attached the Tussie Mussie (it was also made from a scrap piece of chipboard). I used a craft knife to cut out the inset where I would place the moss and tea light.  The switch to the tea light is easily accessible in the bottom of the hat.

The hat is approximately 11" tall.  Great size for a mantel or table decoration.

Friday, October 16, 2015

Home Decorations - WITCH Word Embellished with Graphic 45 Halloween Papers, Mushrooms, Moss, and of course a Spellbook

A few years ago I got a a wooden "WITCH" from The Stinkin' Cute Scrapbook Shop & Boutique in Blackfoot, Idaho.  I had made one a few years ago and thought it was time for another so I pulled it out and finished it up for my Mother-in-Law's mantel.  Turned out FUN!

Here's a few close up pics


 Handmade a little clay hat and tiny removable spellbook for her ... and yes, for fun, I melted her little hand into a ROCK ON sign :D


WISH Birthday Card using Lavinia Stamps Dandelion carrying Fairy & Dancing Fairies on Tim Holtz Color Wash & Dylusion sprayed background

Using two different Lavinia Stamp sets "Make a Wish" and "Three Dancing Fairies" this card was created for my niece's birthday, inside is a holder for a little cash or gift card.  I want her to think about her wishes for the future so there are real dandelion seeds in the bottle.  Our wishes can be unlimited!


Images are stamped with Ranger Ink Archival Ink.  The background is sprayed with Ranger Ink Dylusion and Color Wash sprays on thick water color paper.  A grouping of rhinestones from my stash was put in the middle of the stamped dandelion.  The fairies' wings are glazed over with Triple Thick.  The word WISH at the top are letters made from resin using Martha Stewart's alphabet silicone mold and colored with Ranger Ink patinas & alcohol inks to match the background.  The touches of glitter on the stamped "seeds" and word are made with Diamond Stickles by Ranger. Under the fairy's feet is just a shadow of Black Soot Distress Ink by Tim Holtz.

In the mini bottle are 3 real dandelion "wish" seeds that I gathered earlier this autumn.  E6000 holds the cork in so those seeds will be there for her in years to come should she need them.  A tiny metal butterfly (also touched with Diamond glitter Stickles) hangs from the copper chain that is held with two diamond shaped rhinestone brads.  I brushed a Krylon silver pen over the chain in a few spots so it would match the  brads (I've had those brads in my stash for probably 10 years!)

Green and black paper is by Bazzill.


Thursday, October 1, 2015

Handmade Runes (Rune Stones) for Halloween Psychics & Fortune Telling Props

That Fortune Teller at your Halloween party needs some props to be authentic - but if you don't want to spend a lot of $ on real engraved rocks make your own from clay! I bought a $5 block of polymer clay from Walmart, rolled it out, cut shapes and "engraved" the rune symbols by pressing a straight screwdriver edge into the clay before baking. You can search for symbols on the net, there are different sets with different meanings.  The set I used is found HERE . After baking for 15 minutes I colored them with Acrylic Paint (black) and alcohol inks (Adirondack Inks by Tim Holtz) and sealed with Triple Thick for a gloss finish.  Now the Fortune Teller is ready!


I made 2 sets, one with a 1-inch polygon shaped clay cutter (you could also use fondant cutters - they're like tiny cookie cutters).  The little 1/2-inch square runes are just cut out with a pizza cutter.  
So if your "Psychic" needs these, they take about 2 hours total and then let the coating dry over night.

Saturday, September 19, 2015

Sturdy Handmade Wand for Halloween or Cosplay has a Creepy Forest Coloring - Metal Core

 ... has a metal center, so it's very sturdy.  Made with alcohol inks, wood, acrylic, resin, beads & baubles.  Was really fun to make :D
It's about 10 inches long, with the widest end about 2 inches wide.  The smallest tip is about 3/8" (I don't like little skinny wands, they look too fragile).

I'm still going to make more "real" wands with wood centers and stones but this one is just for fun.  Here's a few more pics with different backgrounds and perspectives.

Both sides of hand held end: