December 2015
What a fun tag to end the year with - made a clay Santa face from a mold - BELIEVE is one of Tim's rubons and the frame is Stampin' Up. Since I don't have any of Tim's new punches (YET!!) I used one of Martha Stewart's.

November 2015
Such a fun tag I had to do two. Using both the pumpkin and the raven from Tim Holtz stamp set (stamping the images twice and cutting a piece or two to 3D) ... the grape leaf punch is McGill and the paper for the leaves was just cheap cardstock sprayed with a variety of Ranger Color Wash sprays.

 I used paint chip strips to cut the word AUTUMN out of since I didn't have a great texture stamp for it. Under the pumpkin, the background is TH stamp coated with white UTEE, and under the raven is TH stencil with Embossing Paste.
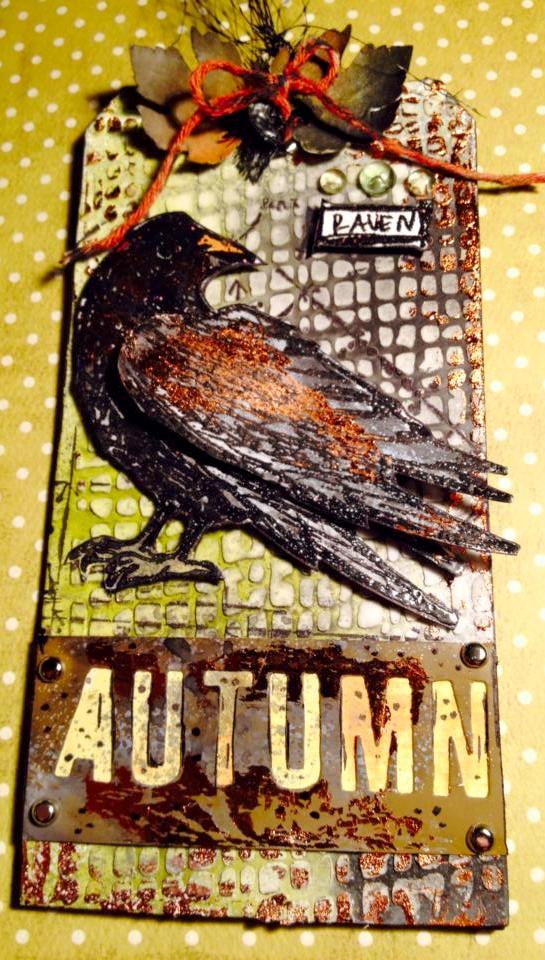
October 2015
Using Tim Holtz Kraft Resistance Halloween Haunts paper for a background I had to use the the Vampire Thinlits die (I received from my dear crafty friend, X. Montano) (WOOT - sooo much fun to use) from his Halloween collection this year. I put a few strips of metallic blue paper in the corners of his hair and behind his eyes for a little touch of bling.

Kept it simple this month since the die had so much detail.
September 2015
I didn't have the Frosted paper so I used the Clearly for Art Modeling Film by Wendy Veechi (also sold by Ranger Ink) for the butterflies. And the Texture Paste Transparent Gloss by Ranger is a must have ! I love it. Although it is definitely a longer drying time than their basic Texture Paste, the effect is fantastic!


August 2015
I found a vintage picture at a thrift shop that I picked up for 25 cents, a little girl in a white full apron and white, almost pointed hat. The background showed a tree and another child's arm. I'm not sure what profession or school she was dressed in uniform for, but she was perfect for this tag. I didn't have the block words that Tim used in his August tag, but I did have the 102 piece set of Tim's AlphaNumeric Thinlits so I could make my own words!

June 2015
Since I'm not a coffee drinker I decided to focus on Father's Day for the June tag. It was a hard choice between Tim's antlers die and the award die ... went with the award ribbon.

May 2015
Morticia is one of my favorite fictional characters and is given lines that makes me smile, couldn't resist using her on my "nostaligic" tag. --- ----
"I'm just like any modern woman, trying to have it all, Loving husband, a family, it's just I wish I had more time to seek out the dark forces and join their hellish crusade." Morticia Addams

ok ok ... so I got a little distracted from the nostalgic theme by one of my favorite fictional characters, Morticia Addams. But hey ... I followed some of the techniques --
 |
| I clipped out the word "Occultism" from some torn dictionary pages that a friend sent me for altering items ... thought that was appropriate for Morticia. |

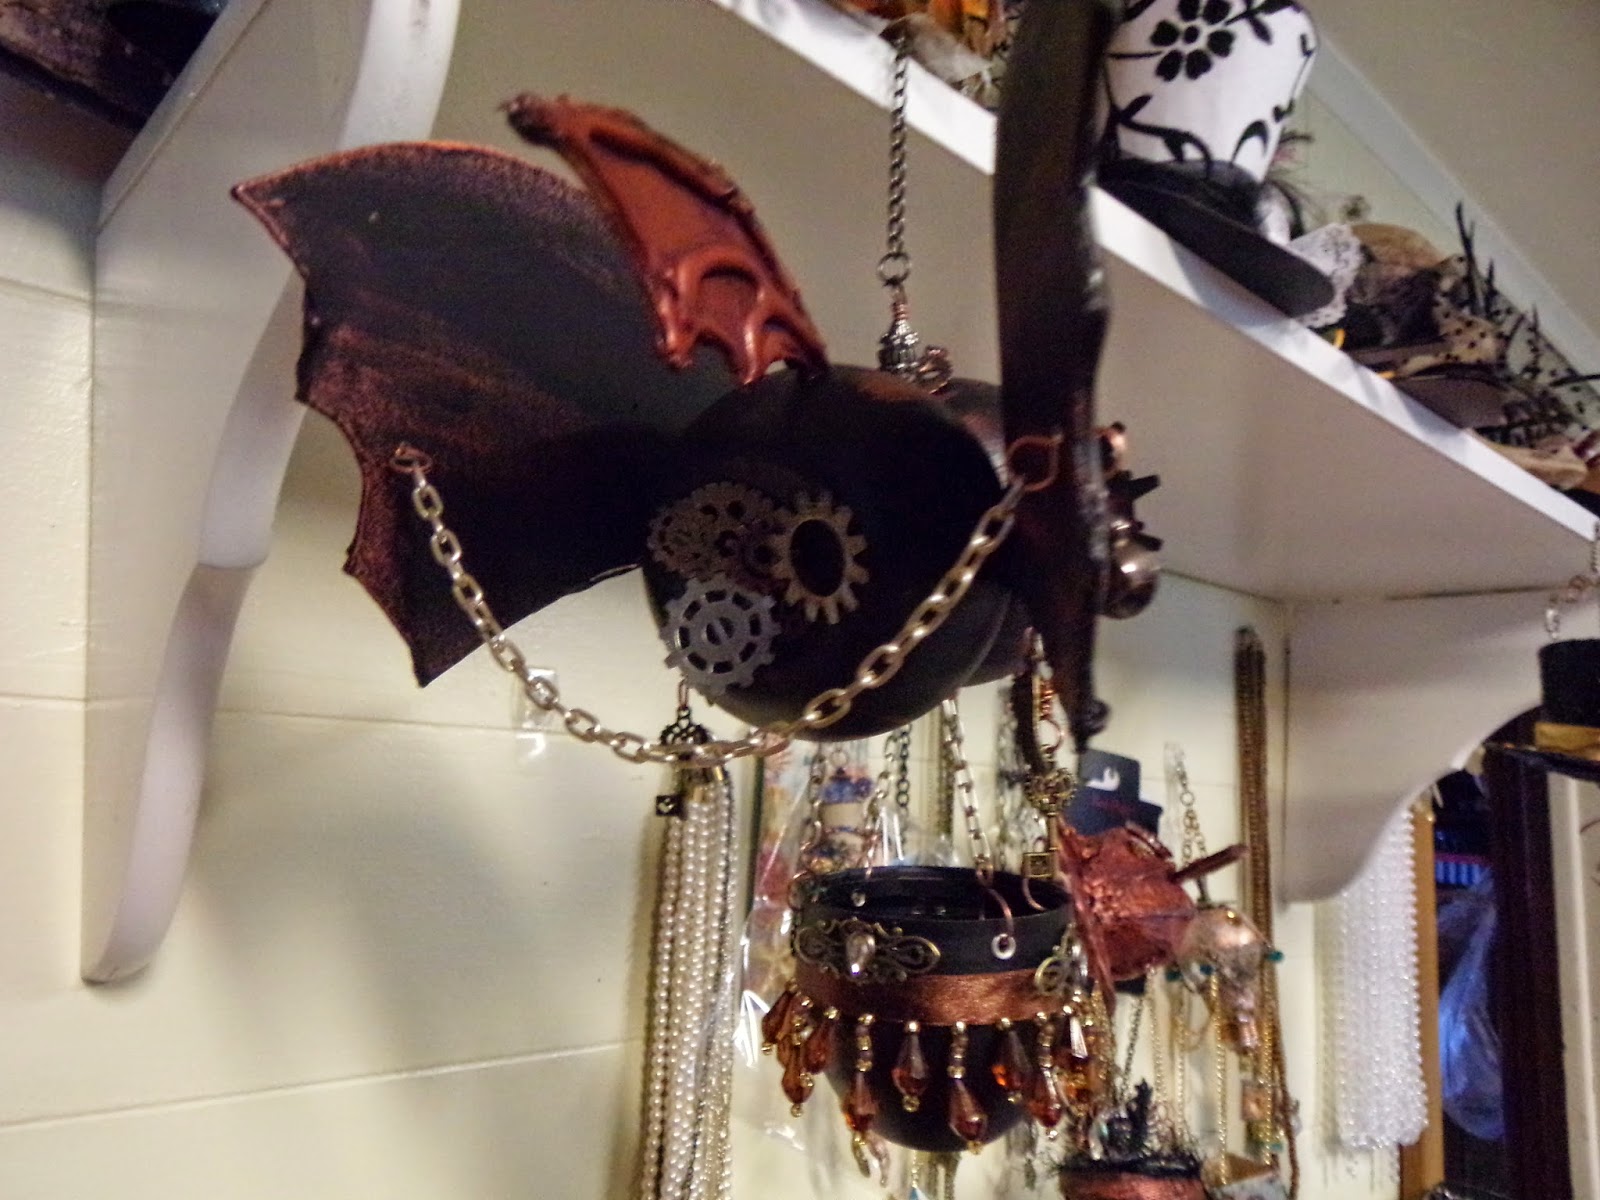
A broken necklace chain (touched over with a silver Krylon pen) served the perfect hanger for a chandelier charm that I bought from ebay - E600'd a little flatback plastic skull on the charm and used Tim Holtz Adirondack inks on it to give it more of a Gothic look (In Red Pepper and Pitch Black, then tapped the silver Krylon pen over it). The same treatment was used on the filigree behind the roses. I remembered I had a bag of old vintage silk flowers snagged from a thrift store. These were purple and fuscia until I sprayed them with Dylusions sprays from Ranger. The leaves were punched from McGill leaf punch and splatter sprayed with black Color Wash spray by Tim Holtz. To "splatter" with the sprays you barely compress the plunger a little at a time (it's a little messy so I have a special box set aside just for spraying into). The large rose at the top is from I Am Roses and received the same spray treatment.

APRIL 2015 - My mother, Catherine's favorite flower was the purple iris and they grew wild around the land in Odd, West Virginia where I grew up. During the summer I would get off the bus and pick a few and hold to them with dear life as I climbed up a rocky rutted hill to our trailer home nested between the mountains and trees. Turned out it was also one of the favorite flowers of my husband's mother (Linda) and her mother (Merle) as well.
 |
| I loved the design elements Tim Holtz came up with for this month's tag. I just had to add a touch of "Majik". The little metal charm is "painted" with Ranger Patinas. The iris is layered, I stamped it 3 times and cut different layers to give it more dimension. The stamp manufactured in the USA by Crafter's Companion and was designed by Sheena Douglass as part of the stamp set - A Little Bit of Floral - Iris |
MARCH 2015


I attached the "mask" of the stamp (that I stamped on a piece of acrylic from packaging) with E6000, bent up the wings, and added some Stickles so the butterfly would look like it was taking flight.
This was quite an enjoyable tag to make, one of my favorites so far.
FEBRUARY 2015

Heart cut from red velvet with Tim Holtz Love Struck die, 9<3 is a real playing card cut up, the K<3 is a clipart from the internet, the Heart Tarot card is a scanned and reduced copy of a real tarot card, Platinum UTEE, Holtz Heart Charms, background papers are Tim Holtz' papers from many years past , the red heart under the King card is cut from the scraps of the card
JANUARY 2015

My version of Tim's January tag has a few different features than his tutorial .. the background I followed almost exactly except I ran a black Sharpie down the edges for outlining and at the top, there's a "blob" of Platinum and Black UTEE.. Instead of ChitChat stickers I used Idea-ology Remnant Rubs (Life Quotes) - rubbing them on thick white cardstock and cutting them out ... the large resin clock (Prima) was altered by staining it with Krylon pens in Silver and Copper. The number "2" is cut from thick chipboard using Tim Holtz' Vintage Market Die, the "0" is a wood number from my stash, and the "15" is Tim's Idea-ology Game Pieces (color changed by Krylon and Sharpie pens). A silver chain was folded and tied in with the ribbon, draped over the corners, and adhered VERY lightly with a drip of hot glue on the back - the star is Tim's Mirrored Stars


.JPG)


.JPG)