Sunday, September 27, 2020

DECOMPOSING DANIEL - the paper mache Apoxie rotting gourd Halloween Home Decor / Prop (PUMPKIN, SQUASH)

 
We all have those goto YT channels of people that inspire our creativity.  One of mine is Eduardo Talbert who creates Monster Tutorial videos.  If you love making at home ooey gooey and Halloween decor and props he brings it down-to-earth with supplies that most of us have (if you're a crafty person) or that you can easily get.  Recently I watch his ROTTEN GOURD TUTORIAL and was inspired.  He used a foam home decor gourd from Hobby Lobby (I think) but I didn't have one and no way to get to a craft store while the creative juices were flowing so I knew I had to come up with an alternative.  


I grabbed a bunch of plastic bags from previous shopping trips and taped them in the shape I wanted using masking tape (something PVA glue will adhere to).  My poofy "armature" ended up being close to 15 inches tall.  I added a layer of single-ply paper towels by brushing them (saturating) in a mixture of 1/2 PVA (Elmer's) glue and 1/2 water - you can always make more so start of with a 1/2 cup each.  After a few projects I found it was just easier to buy Elmer's by the gallon (from either Walmart (right now as of Sept. 2020 a gallon of Elmer's is $11) or Amazon).  LET THAT LAYER DRY COMPLETELY.   I then added a strong piece of curled wire in the "handle" end to hang a leaf.

Then add additional layers of single-ply paper towel strips or newspaper you've torn to strips.  Allow to dry completely every 2-3 layers so you don't end up with trapped moisture and a potential for mold or soft spots.  I only did about 6 layers but if I had it to do again, I'd probably do at least 10-12 - especially if I was going to sell it.

For the final layer (or two) start squishing and wrinkling the paper strips to give texture.  The final layer is toilet paper because it makes a much more detailed surface of lumps, creases and bumps.

Let thoroughly dry.

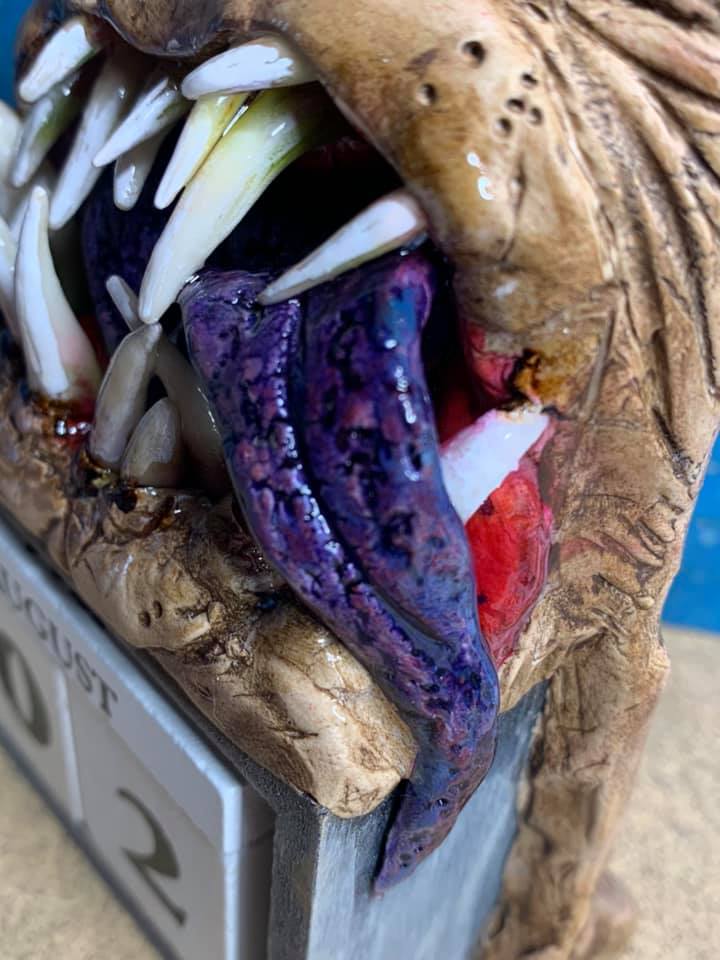
Paint a base coat with acrylic paint or spray paint. I used acrylic brush on for Daniel and did a primary coat with purple chalk paint (mixing Waverly Chalk Paint (a red and blue) to get a base.   

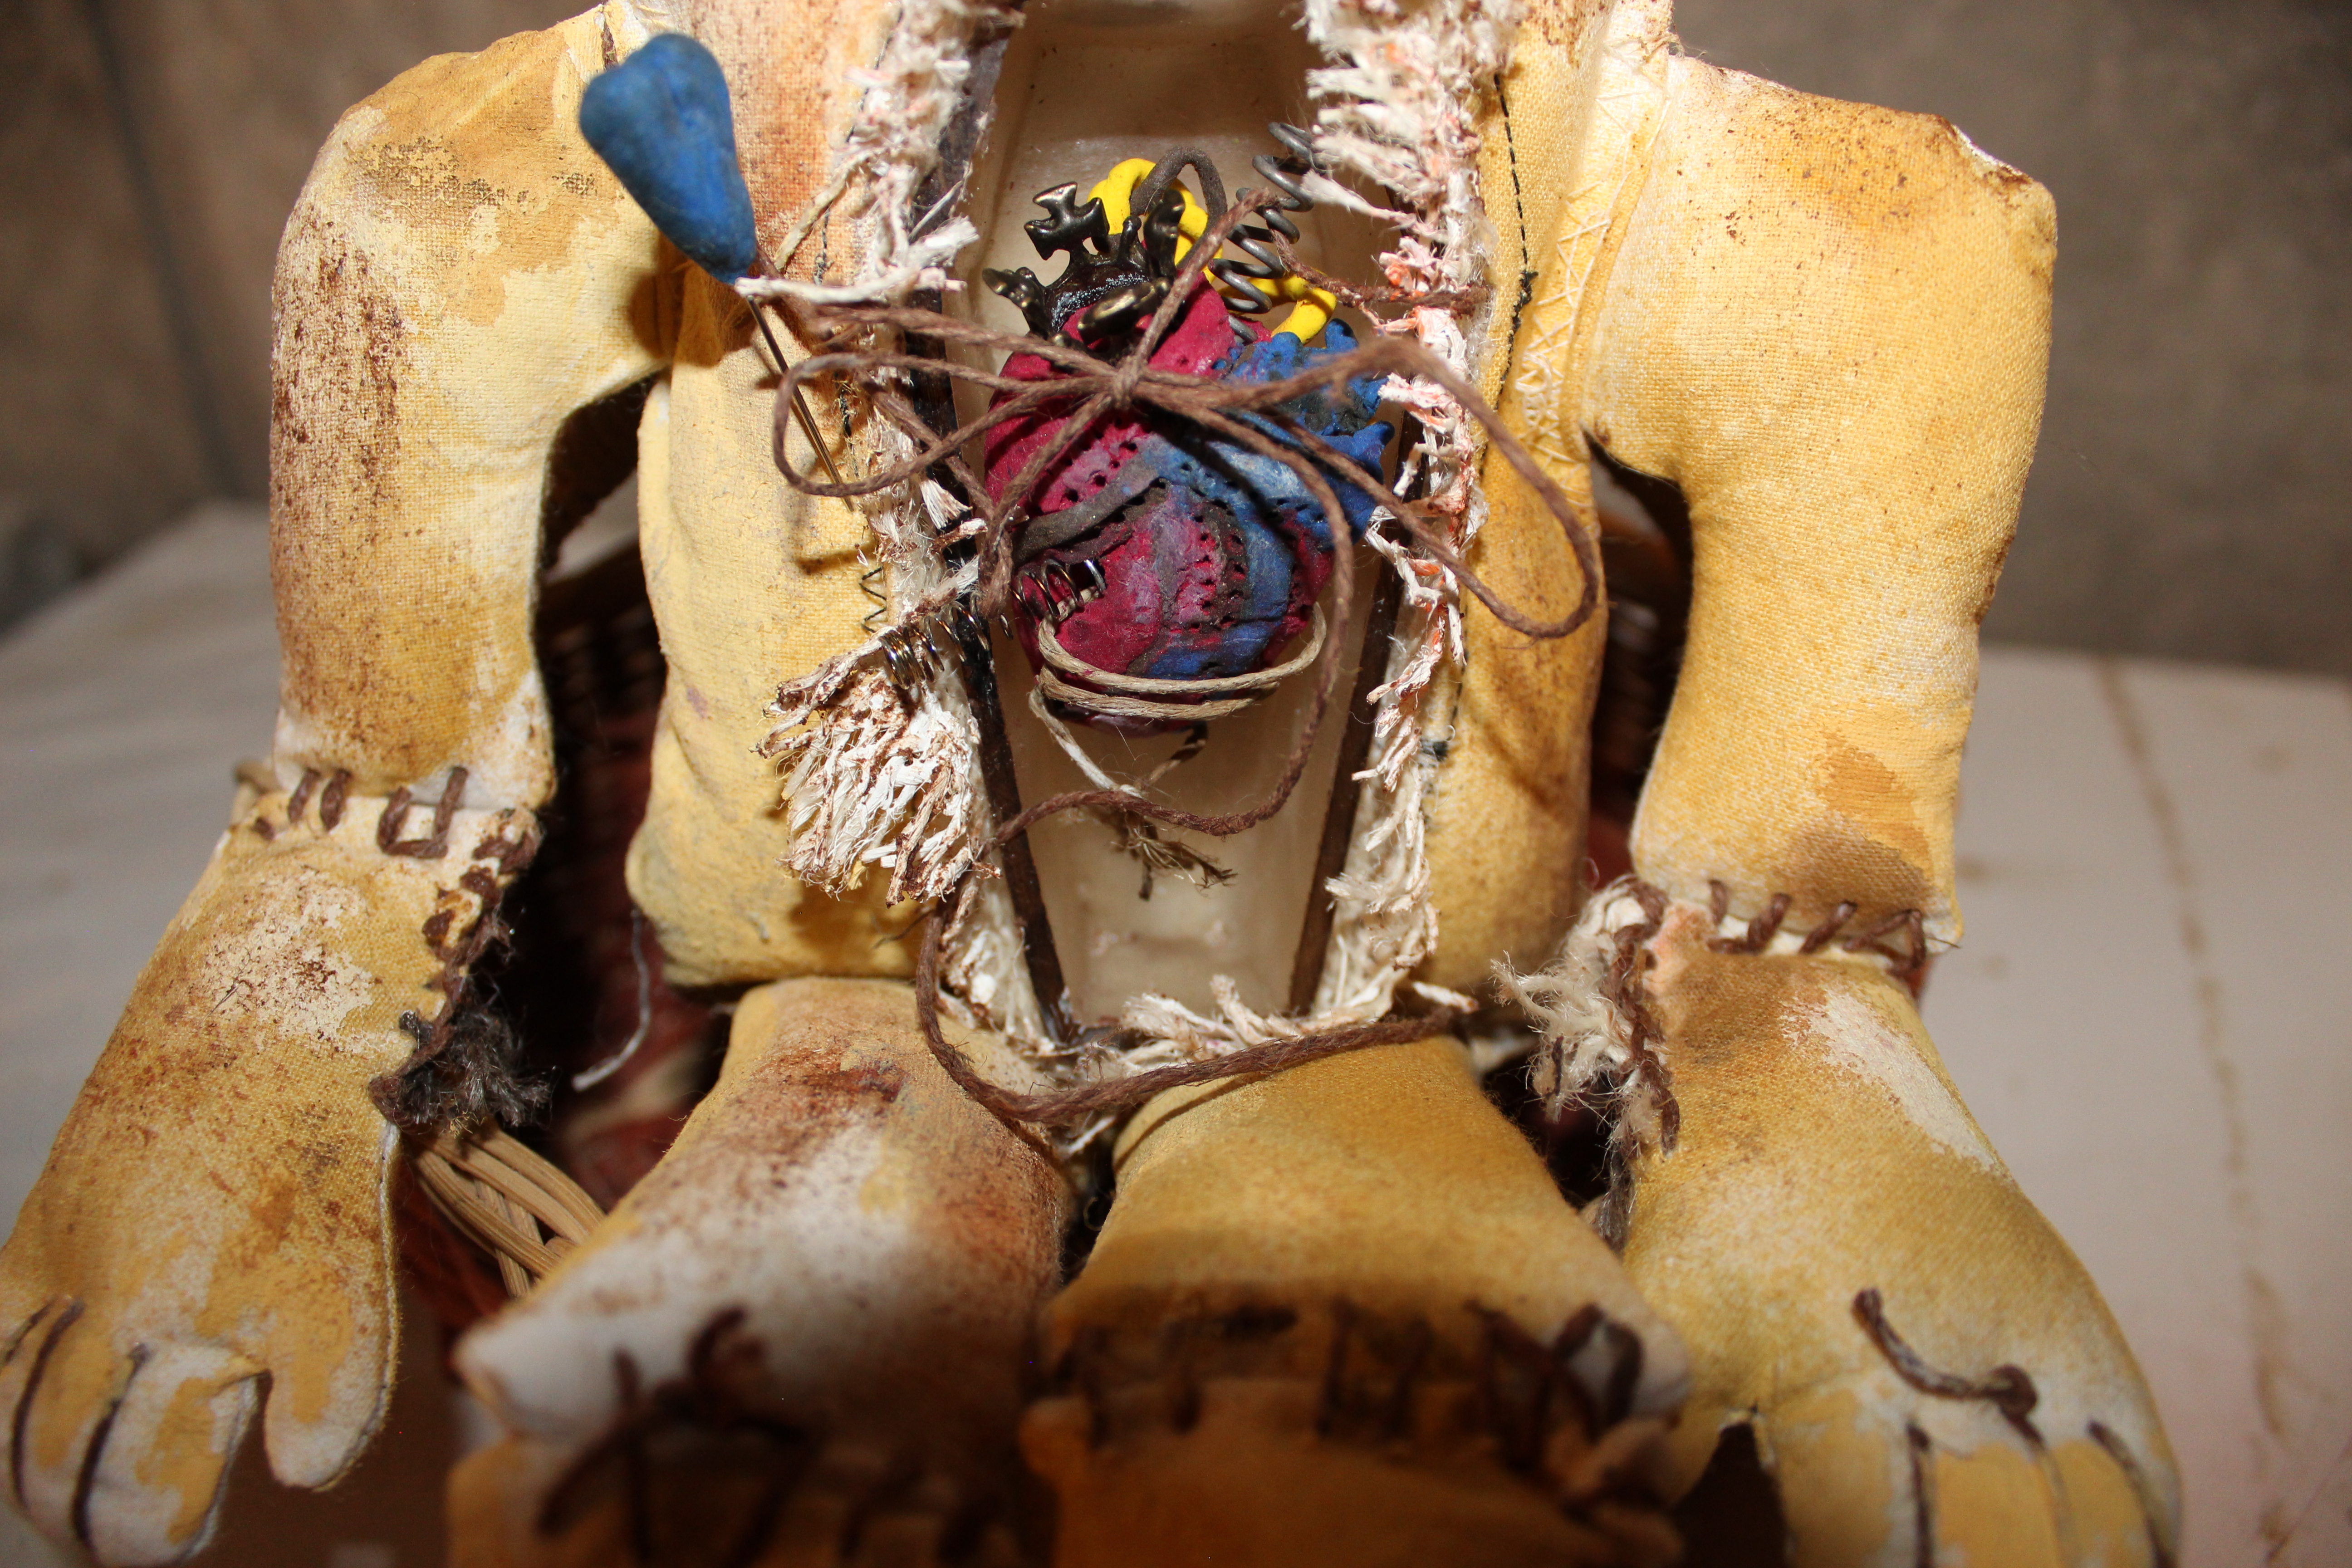
You can see the variety of plastic bags inside.  I decided to leave them to help hold up the teeth. 

After it dried I cut out a mouth shape and little holes where I wanted the nose and eyes and packed in some aluminum foil.  Painted the foil black and sealed to mache with a little resin.  

I used Apoxie Sculpt for a tongue and eyebrows.  Since there's a lot of little nieces and nephews coming by I wanted something sturdy in case a little hand decided to pull on the tongue.  Added in premade eyes and painted the rest.


A metal leaf  taken off a Dollar Tree Halloween decor piece added the right touch after being dabbed with brown and gray paint. 

For the fuzzy "mold" see the Monster Tutorial video linked above in the first paragraph.


Friday, September 4, 2020

The ANGRY POPTART Perpetual Calendar with lots of tongue and fangs made with Apoxie and Resin

 I found an inexpensive perpetual calendar but it was fairly plain.  Added some cold porcelain handmade teeth and some APOXIE and giggled when my adult son critiqued, "It looks like an angry PopTart."  I just love him ... hairy moles and all


This is what it looked like to start with 


Monday, August 31, 2020

Meet MR. STITCHES!

Months ago I started playing around with some fabric, resin and clay and out he came in his toothy glory.  He is already in his new home with a loving owner but I just had to share his wonky little face and body, I love his look, and his little clay heart, with matching stick pins, all tucked into a resin coffin.   From what he whispered in my ear, Mr. Stitches should have a sister arriving sometime around Halloween who will be looking for a home.  Although he decided to stay in the "buff" ~ she will most likely have on some holiday attire.  

He's almost 2 foot tall and seemed to like the dark places where the  creepy crawly things lurk in the corners. - here's pictures of him hiding in the basement on top of a permanently stained old freezer, he wouldn't let me look inside, wonder what (or who) he's hiding in there?  

Do you feel the Autumn breezes rolling in?


Backside
A little view of the backside


Saturday, July 25, 2020

FACEBOOK PAGE

I'm not as social media savvy as many but I'm learning:
here is a link to my Facebook Page:  https://www.facebook.com/LisaJuJuCrafts/

Handmade Greeting Card using Molly Harrison / Crafter's Companion SEA OF BUBBLES Mermaid stamp set and Spectrum Noir Inks and Alcohol Markers

I've been really slacking on keeping my blog updated.  Social media seems to be moving away from the blog entries but it is always nice to have a backup, a picture diary, of creations.  Here's a recent card created using the Crafter's Companion stamp, by artist Molly Harrison.  The glitter cardstock is Crafter's Companion Luxury cardstock and the black and purple cardstock is by Bazzill.  White cardstock is the Spectrum Noir Ultra Smooth cardstock by Crafter's Companion.
.

Half back "bubbles" are plastic pieces from my stash except the one the mermaid is holding in her hand is a glass piece, its a bezel cover.
 The background stencil (DROPLETS) is from the Crafter's Companion, Enchanted Forest - Signature Collection by Sara Davies

Monday, March 16, 2020

Spring Home Decor using Crafter's Companion sentiment stamp & inks & thriftstore frame

I had a little frame that cost less than $1 from a second-hand store.  I had painted and repainted it and threw it in a drawer multiple times until I received the Verse stamps from Crafter's Companion.  Using Spectrum Noir water colour ink jars, I made a quick background, stamped the image and remembered the sad little frame stuck in the drawer.  A little chalk paint, glue on some embellies from my stash and now it's one of my favorite new makes.  Such an easy way to upgrade your home décor for the season.

Fairy Dream Tag Caddy Night Light with Shadowbox Book in Drawer

Sometimes you wake up from an amazing dream and know that you don't want to forget it.  It's always good to have a little pad of paper and a pen handy to write down the details before they go fuzzy in the morning light.  I used medium weight chipboard to create this caddy that will hold several tags, a handmade paper pad, pen and has a fun fairy diorama night light to boot … oh and a little shadowbox hidden in a "book" that fits snuggly in the drawer, filled with mushrooms and fairies to take your imagination away to dream again in the land of the fae.  The paper and dies used  are  the Enchanted Forest line by Crafter's Companion, one of my favorite crafting collections.


Sunday, March 8, 2020

DT Margarita Glass Robin Nest Spring Home Decor

Have you ever happened upon an area where the earth is reclaiming an old once-loved property?  Seems like some type of magic is at play.  The paint has started chipping and becoming weathered, decay has set in; yet, little plants and moss have started growing in obscure places.  Forest vines and ivy are veining up bases and through cracks of structures.  

On my last visit to the Dollar Tree I was surprised to find a very thick Margarita glass, it looked out of place among the thin glasses on the shelves.  When I picked it up, the shape reminded me of an old, white iron bird bath I had seen on an abandoned property on the edge of a forested area.  Patina, dirt, vines and moss had over taken it, but a recent spring rain storm had left clear water in its normal murky basin.  Birds were once again flocking to it for a drink.

I tried to recreate the patina in my mind's eye using gesso, chalk paint, and ink wash.  Some dried moss and Baby's Breath with a few feathers made the plastic "robin" eggs look like a viable spring nesting spot for a happy bird.  

I didn't have vines and ivy, but I did have paint, twine, dried moss and … parsley.  Yep, right out of the spice cabinet:  Parsley.  Here is the end result.  It actually only took me a little over an hour to make, well, 2 .. but part of that was watching Supernatural reruns 👻


This is the BEFORE picture - Margarita glass and foam circles from Dollar Tree


Hershey’s Nugget Gift Holder Step Box using Crafter’s Companion Fairy Enchanted Forest

Need a cute presentation for HERSHEY NUGGETS?
Here's a link to the video tutorial (part of it is showing some I made and the other half of the video is the tutorial).   NUGGET Stepper Gift Box Tutorial .  They are actually fairly easy to make.  I had seen several projects using step boxes but they were always "square"- since Nuggets are rectangular I had to make a pattern  If you get one of these from me and you notice that it's mostly the toffee ones, don't judge! 😃 I can't resist the almond and milk chocolate ones.

Most of these in the images are decorated using #CraftersCompanion dies, papers, stamps.  But there's a little #TimHoltz and #MarionSmith products as well.


Wednesday, January 1, 2020

Altered Little Wood Box with Prima Mold Resin

Every time I take a glue stick out of my little box, I always think it needs a revamp - what a better date than on January1st.  I pulled out some resin pieces - the larger one from a Prima mold and the little Charlotte dolls from a mold I made years ago.  Add on some Tim Holtz Patina and some paint... a few tiny glass pearl beads and some ground Parsley to look mossy — now it’s just my style.  Fun way to start 2020-HAPPY NEW YEAR