Saturday, June 28, 2014

Dia de los Muertos ( Day of the Dead ) Rosette Challenge with Handmade Flowers


Another challenge from The Craft Hole!  Friday night challenge, to create a rosette (at least 6") and decorations/theme is up to you :)  I had already found this clipart on the net and had it mounted on chipboard with some Triple Thick coating so it worked perfect to have a Day of the Dead rosette.  Dotted paper from BoBunny, all solids, including the handmade flowers are by Bazzill, stamens and feathers just from my stash.  The banner is another clipart printed on the cheap white cardstock from Walmart.

Saturday, June 21, 2014

High Heeled Shoe Card, using Graphic 45 An Eerie Tale paper, Tim Holtz Bow Tied and Handmade Paper Flower Roses


The Friday Night challenge at The Craft Hole (Facebook Group) gave us a template and 3 hours to make a card - cards are my bane! They take me FOREVER to get the way I want so I was pleasantly surprised the way this one turned out in less than 3 hours. It was my first time using Tim Holtz' Bow Tied Die (another die that I bought because I'm a crafting hoarder and actually didn't think I'd use much and now realize I'm in LOVE with it and will use it day after day after day). By the way, the die was made so that you can join the bow with the Idea-Ology Tiny Attacher and the center pieces are made to perfectly fit over the itty bitty staple.  The man is a crafting genious! 
There unevenness on the bottom is just a shadow.

The background paper is "Enchantment" - part of Graphic 45's new An Eerie Tale line (gorgeous!) and though the pic doesn't show it well, the bow and bottom of the shoe are a metallic gold.  All flowers were made using the EK Sucess Retro Flower (medium size) and leaves are the Punch Bunch Fern punch, Martha Stewart's Branch, McGill's Birch Leaf Punch, the 3 prong leaf is an end off  a die cut from the Tim Holtz Garden Greens die.  Card is made from Bazzill (brown).  The black little ball embellies were white, but that didn't look so "sexy" so I used the enamel black (model paint) and made the color change. :D  Thanks for looking.

Friday, June 13, 2014

FRIDAY the 13th TAG using Tim Holtz Tag, Apothecary and Cargo Stencil Numbers Dies and Resist Papers

Started making this tag on Thursday night and after seeing a tag challenge on The Craft Hole for a tag on Friday 13th decided to use the newly released CARGO Movers & Shapers Die set by Tim Holtz (put a few in the pic below so you can see how they are arranged.  At first I didn't think I would use them, now I don't think I will stop.  I cut  these numbers out of medium/thick black chipboard and altered them with Tim's Distress Stains and Paints and Ink Gold Rubs.  The test tub on the side is a real pharmaceutical grade glass test tube with a cork, I found both at a military surplus store.  Wishbone=Tim Holtz.  The labels are by 7 Gypsies.  Chain handmade from wire in my stash.  Charms & skull from stash.  Eyelets are WeRMemory Keepers.  In the test tube (since the label I chose stated "CHLOROFORM" I used the Huggies wet wipe I had used to clean the ink off my mat, dried it with the RANGER HEAT IT tool and tore off a piece and stuffed it in the test tube for an aged look.  The skull on the resist paper was initially covered in Picket Fence (white) Distress Stain, then rubbed off, dried, coated in CRACKLE Glossy Accents, and after drying touched with some of Tim Holtz' Adirondack Alcohol Inks.


Monday, June 2, 2014

Altered Wine Corks - Steampunk Nautical / Ocean and Victorian

I love love love altering wine corks.  I'm not an alcohol drinker so I have to be a bit savvy in how to obtain them without paying much for them.  JoAnns has some in their floral department but they were quite plain, you can occasionally get some on ebay or etsy.  However, since I wanted quantity and variety I hit up a local Wine Store!  Just walked in and asked if they had any wine corks I could have or pay a couple dollars for and they loaded me up.  I go back every 2-3 weeks and tip the lady behind the counter $3-$5 or give her a cork I altered and she always seems happy to see me :)  I had started working on these a while back and a swap event over on The Craft Hole ( a Facebook group ) inspired me to finish them up.  I couldn't figure out if I wanted to do Steampunk or Beach / Sea inspired, so I combined the two themes.  I used a 3/4" metal washer, painted it, and E6000 glued it behind an oval glass dome for the large eye, did some wire wrapping and added some charm and crystal elements.  The eye reminded me a bit of a squid eye (except the shape) but round just didn't look right :P


Just on a different background so you can make out the flowers better.  These flowers and leaves are from I AM ROSES

Chain and Dangling Rhinestones are from jewelry I took apart -- the porcelain charlotte head with rhinestone collar and metal flower are by Amy Labbe (Art-i-Cake).


Back side

Side View


Wednesday, May 14, 2014

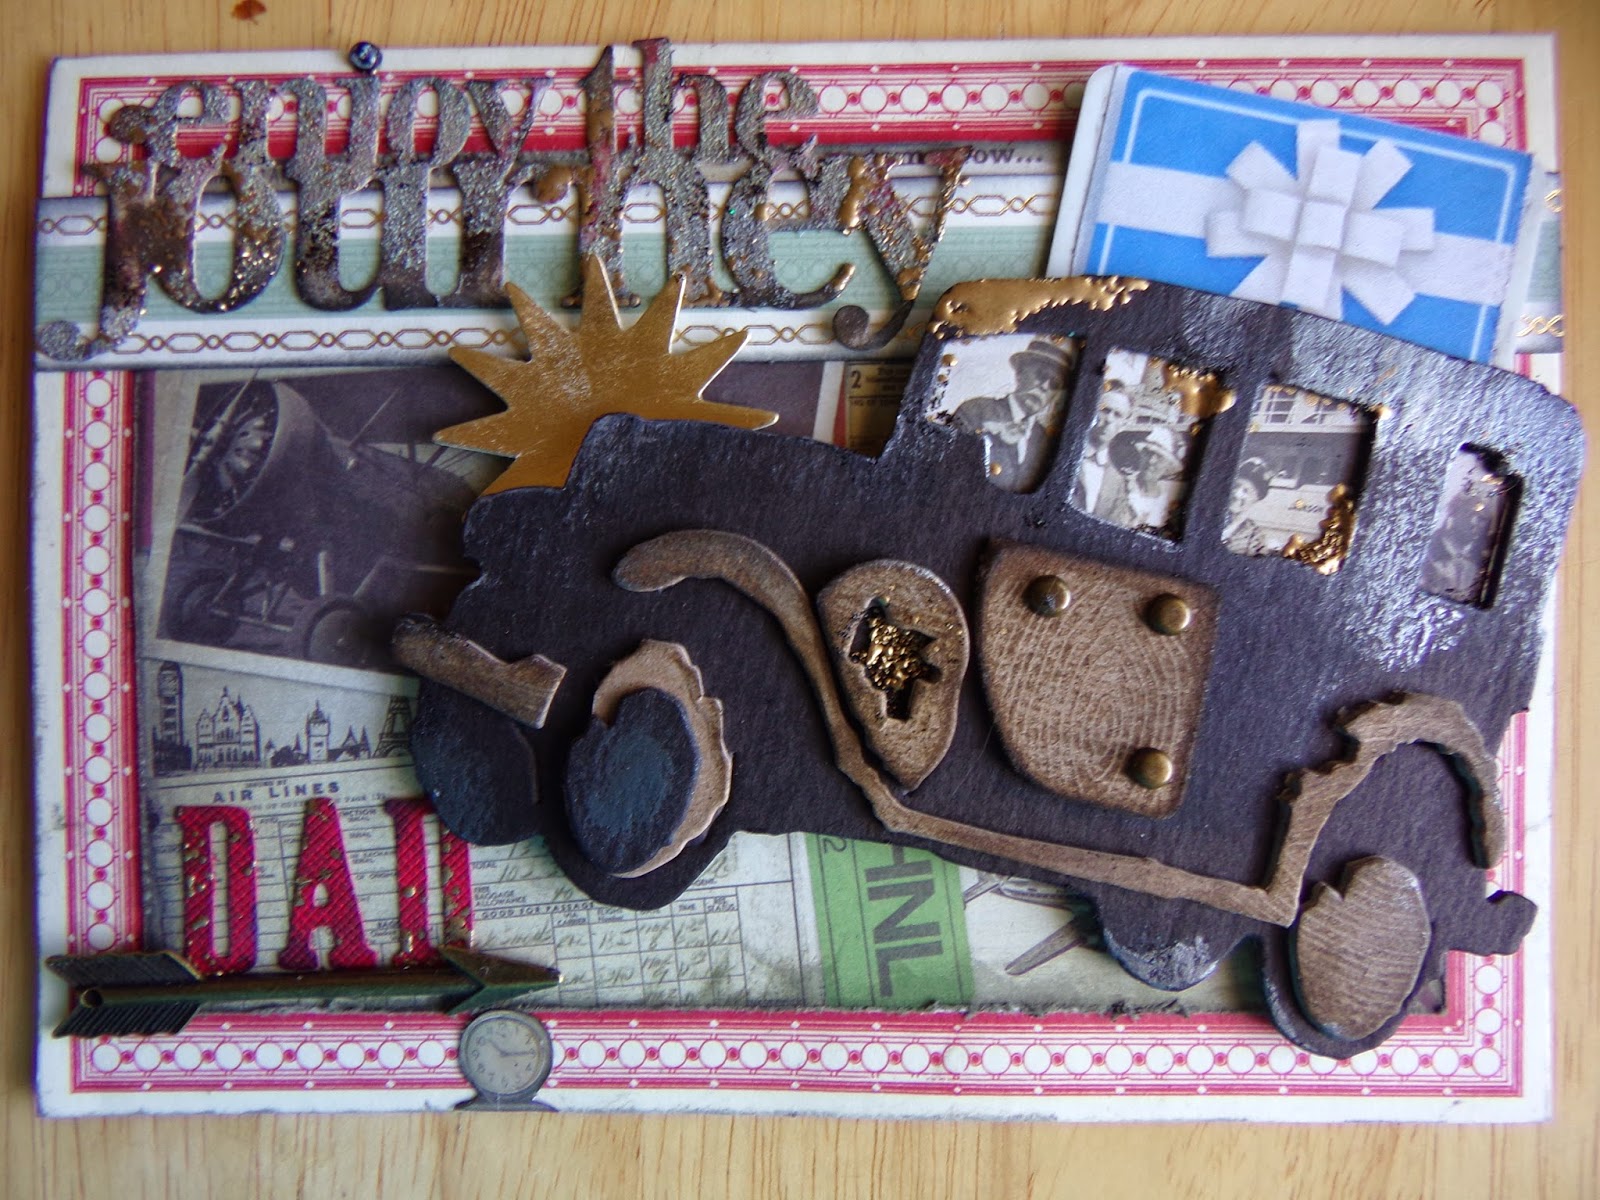
Handmade Father's Day Card using Tim Holtz & Anna Griffin elements

I made a fake gift card - there is a sleeve behind the card to hold the card in place, the car is Pop-Dotted up for more dimension.

Without the gift card

The door and "wood" trim is cut out of kraft colored chipboard and stamped with a wood texture stamp using walnut ink stain, the "enjoy the journey" "dad" and Old Jalopy are Tim Holtz die cuts, embossing powder is Distress Powder in Pumice Stone and the gold accents are Gold UTEE (Ultra Thick Embossing Enamel) - the background paper is Tim Holtz, the card base, gold foil starburst and blue/white/gold border is Anna Griffin from her "Just for Him" card kit. The faces in the window and the tiny clock is cut from Tim Holtz papers, the brads & arrow are from my stash, but a similar style arrow embellishment is available from Tim Holtz.  Background paper is distressed with TH Distress Tool and Pumice Stone Distress Ink is on the edges.  Red cardstock that "DAD" is cut from is Bazzill. Car door was a handcut addition.

Monday, April 21, 2014

Handmade Mother's Day Card with Graphic 45, Tim Holtz Window Box & Pediments Dies, TresorsdeLux, Funkie Junkie

I had to use the Tim Holtz Window Box die that I just bought so I decided to make a Mother's Day card.  I guess you could use it for more than just Mother's Day :P  The top of the window is Tim Holtz' Pediments die The Ivy is cut from a die from Cottage Cuts.  Flowers are from the Funkie Junkie, I Am Roses, The paper with the girl in the garden is from Graphic 45's Secret Garden line, the card base is from Anna Griffin,  the vintage blue fabirc flowers, metal filigree and stick pin / beads is from my stash,  The gold tip shabby chic flowers and gorgeous lace is from https://www.etsy.com/shop/TresorsdeLuxe‎ 


Saturday, March 29, 2014

Handmade Prom Dress Remembrance Card to hold Gift Card with Embellishments from I Am Roses and The Funkie Junkie

A  wonderful teenager  I know is planning on a black and white prom dress, plus this is the year she graduates so I had planned on making her a card to hold a gift certificate to have her nails done prior to Prom night.  A group The Craft Hole on FB also had a challenge to make a "dress card" and posted a similar pattern to the Sizzix Pro Dress Box Die that I recently purchased.   Enacting the old adage of "Killing Two Birds with One Stone"  (plus the challenge had a deadline so I had to get it completed :D ) this is what I came up with.  I cut out the box die and clipped off the dress shape from both sides, glued just the top bodice pieces together which left the dress portion as the perfect hiding fold to hide a gift card.  I added loose flat back pearls around the neckline and around the piece of lace on the bottom.  The white feathers were pulled out of an old boa and hotglued on the front (for a feathery trim waving toward the top of the dress) and also hotglued on the back of the front piece (for a feathery trim waving under the dress)  A piece of open lace (from a swap received from Alica R.) was glued on the front and back edging the feathers. The big rose and leaves are from I AM ROSES, ribbon roses from my stash and the small roses were handmade by The Funkie Junkie.   Added a scrap of rikrak and pink velvet ribbon and it's the perfect card!

Thursday, March 27, 2014

Working on Ursula's Revenge - Getting the Dead Mermaid ... to look ... well.... Dead

For a couple of months I've been gathering items to make a mermaid / ocean theme project, never quite sure what I wanted.  Some days I was thinking about
happily walking on the beach, others I was thinking sinking pirate ships and the Kraken -well, the dark side of me is winning this battle as I picked up a dollar store skeleton and started making the mermaid portion.  I'll post more as the project gets under way -- I'm sure it's not exactly "viewable" but after a lot of pulled hot glue, E6000, Stickles, Adirondack Alcohol Inks, and Triple Thick, she's starting to take shape :) here's a little sneak peek for now:

Friday, March 21, 2014

Wire Wrapping Patina 'd Eye Charm Triangle Earrings ( Upcycling )

Although these aren't going to be a mainstream approval for earrings they turned out right at my taste level - These were made from wire found in a military surplus store and a broken eye charm bracelet from my stash ... thought they sorta turned out cool -- not sure if they remind me of Egyptian All Seeing Eye stuff or just the eyeball on top of the pyramid on the back of the dollar bill :D but thought I'd share for fun.  All components (the earring hook, wire wrapped triangle, and jump rings are all handmade ( the turquoise stone beads were from a bead strand  purchased from JoAnns ). The patina (blue and green) is Vintaj Patina by Ranger Ink (the same one that makes Tim Holtz Adirondack inks).


Sunday, February 23, 2014

Tim Holtz 12 Tags of 2014 (my version)

I've always wanted to follow along with Tim Holtz' 12 Tags blog and since the FB group The Craft Hole sent  a challenge to do it to the members, I finally have the incentive to complete it! If you're interested in what Tim Holtz' original design inspirations were, go to his web at www.TimHoltz.com


December 2014                                                                                
I am so excited! I actually finished a whole year of tags! and did them month by month.  Looking forward to next year's inspiration from Tim Holtz. On this December tag, I mixed the paper die cut greenery with some pieces of faux greenery cut from a Christmas pick to give it more 3D layering.

November 2014                                                                                 
Since I didn't have the Layered Leaf and I didn't even start the tag until after Thanksgiving, I decided to use the Layered Snowflake die and add a tag for the winter seasons.

October 2014                                                                                     

September 2014                                                                                 


August 2014                                                                       


July 2014                                                                            


                         June 2014

                         May 2014


                         April 2014

                      March 2014


February 2014


January 2014 Tag